Siirrytään vaihteeksi vähän kevyempiin aiheisiin. Arvasitte ehkä jo otsikon perusteella, että kävin taas uudella kurssilla. Olen ottanut tavakseni opetella joka syksy jonkun uuden tekniikan. Tällä kertaa valikoitui tekniikaksi ekoprinttaus. Suomenkielinen nimi ei ehkä oikein anna selkeää käsitystä mitä ekoprinttauksessa tapahtuu. Totuudenmukaisempi termi voisi olla kasvipainanta, tosin sekin saattaa antaa mielikuvia siitä mitä lapsena harrastettiin, eli väritettiin kasvien lehtiä peiteväreillä jonka jälkee niitä paineltiin paperille. Ekoprinttaus ei kuitenkaan vaadi mitään väriaineita, sillä värit tulevat kasveista itsestään. Tällä kurssilla ekoprintattiin paperia, mutta yhtä hyvin sitä voi tehdä myös kankaalle, jolloin ohjeet ovat hiukan erilaiset.
Tarvikkeet
– kasvien osia, kukkia, lehtiä, kuivuneita tai kuihtuneita kasveja jne
– tukevaa vesiväripaperia
– alunaa
– isohkoja laattoja tai levyjä jotka kestävät keittämisen
– iso kattila jonne isot laatat mahtuvat sisälle
– rautanauloja tai hevosenkenkiä (tai rautavihrilliä)
– narua
– vettä
(-keittolevy)
Ekoprinttauksessa kasvien omat luonnolliset väriaineet siirtyvät alunan, kiehuvan veden ja raudan avustuksella paperille. Lopputulos on aina yllätys, eikä sitä ihan tarkalleen voi kontrolloida. Usein lopputulos ei ole edes identtisenä toistettavissa, vaikka materiaalit olisivat täysin samat. Paperit kastetaan aluna-vesiseoksessa, jonka jälkeen ne ladotaan laatojen väliin vuorotellen kasvikerrosten kanssa. Liian paksut, terävät ja kovat kasvienosat poistetaan, jotteivat ne riko paperia. Paksuista kukinnoista voi käyttää vain terälehdet. Asetteluun voi käyttää omaa taiteellista näkemystä. Laattojen väliin pinottu nippu sidotaan tiukasti kasaan naruilla jonka jälkeen koko nippu laitetaan kattilaan, kiehuvaan veteen hevosenkenkien tai rautanaulojen kanssa ja annetaan kiehua 1-2 tunnin ajan. Nippu nostetaan hetkeksi jäähtymään ja sitten kun sormet kestävät lämpöä, nippu avataan. Kasvit poistetaan ja paperit asetetaan yksittäin kuivumaan pyyhkeelle, lakanalle tai pyykkitelineelle. Kannattaa huomioida että jos käyttää myrkyllisiä kasveja kuten pietaryrttiä tai monia perennoja, keittäminen kannattaa suorittaa ulkona. Myös alunalle herkät voivat saada oireita sisätiloissa kattilaa keittäessä.
Dark red leaves of vine and flowers of ladies mantle.
Jännittävää on että jokainen kasvi tuottaa erilaisen lopputuloksen. Läheskään kaikista ei irtoa väriä, mutta kasvi voi silti jättää paperiin jäljen, eräänlaisen varjokuvan. Lehtien eri puolet antavat erilaisen kuvion. Kuvio voi olla positiivi tai negatiivi ja joskus väri voi levitä niin että se on vain pelkkä läikkä paperilla. Värit voivat siirtyä myös paperin läpi seuraavaan paperiin tai paperin toiselle puolelle. Hehkuvan punaisista lehdistä tulee usein tummaa vihreää väriä. Violeteista kukista ja lehdistä voi tulla vihreää tai sinertävää. Jotkut keltaiset kukat antavat punaista väriä, jotkut eivät oikein mitään. Oransseista kukista ja lehdistä voi tulla vihreää tai voimakkaan keltaista. Ruskeista lehdistä voi tulla ruskeaa väriä, vihreistä lehdistä voi tulla vihreää, sinertävää, kellertävää tai sitten ei oikein mitään. Vadelman lehdet antavat usein ruskeaa ja raudan kanssa reagoidessaan mustaa. Maitohorsman lehdet antavat usein ruskeaa ja vähän mustaakin. Vuorenkilven ruskeat lehdet antavat ruskeaa ja mustaa.
Tällaisena perfektionistina minua kiehtoo tekniikka, jossa en itse voi juurikaan hallita lopputulosta. Se kehittää sietokykyäni epätäydelliseen, kontrolloimattomaan lopputulokseen, jossa luonto ja sattuma hoitaa varsinaisen luomistyön. Voin toki ohjata teoksen syntyä valitsemalla ja asettelemalla kasvit. Lopputulos on aina enemmän tai vähemmän sattumanvarainen, vaikka kokeilun ja kokemuksen kautta kontrolli kasvaa jonkin verran. Lopulliseen kuvioon ja värimaailmaan vaikuttavat valitut kasvit ja niiden sisältämät väriaineet ja niiden määrät, raudan määrä keitoksessa sekä valittu paperi. Ostin kurssia varten kolme lehtiötä akvarellipaperia. Yksi lehtiöistä oli muovitettu joten en ostohetkellä tajunnut että paperi on hennosti lilan sävyinen, verrattuna muihin papereihin. Keitoksessa värisävyt tasaantuivat ja paperin lilasävyisyys hälveni. Toki saattaa olla että paperi vaikutti kaikkien muidenkin paperien värisävyihin. Kuviin valitsin omia suosikkejani joissa muodot ja värit miellyttävät omaa silmääni eniten.

Let’s move on to some lighter topics for a change. You may have guessed from the title that I took another new course. I have made it a habit to learn a new technique every fall. This time, I chose eco-printing/botanical printing. Term eco-printing may not give a clear idea of what it actually is. A more accurate term might be plant printing o botanical printing, although that might bring to mind something we did as children, namely colouring plant leaves with paints and then pressing them onto paper. However, eco-printing does not require any dyes or paints, as the colours come from the plants themselves. On this workshop we printed on paper, but this can be done on fabric too. For fabric the instructions are slightly different.
You need
– Plant parts, flowers, leaves, dried or dying plants, etc.
– Sturdy watercolour paper
– Alum
– Large flat tiles or plates that can withstand boiling
– Large pot that can hold the large tiles
– Iron nails or horseshoes (or iron rods)
– String
– Water
(- cooking plate)
In eco-printing, the plants’ own natural dyes are transferred to paper with the help of alum, boiling water and iron. The end result is always a surprise and cannot be controlled precisely. Often, the end result cannot even be reproduced identically, even if the materials are exactly the same. The papers are dipped in an alum-water mixture and then stacked between tiles, alternating with layers of plants. Plant parts that are too thick, sharp, or hard are removed so that they do not tear the paper. Only the individual petals of thick flowers can be used. You can use your own artistic vision for the arrangement. The bundle stacked between the tiles is tied tightly with strings, after which the entire bundle is placed in a pot of boiling water with horseshoes or iron nails and left to boil for 1-2 hours. The bundle is lifted out to cool for a moment, and then, when your fingers can withstand the heat, the bundle is opened. The plants are removed and the papers are placed individually on a towel, sheet or drying rack or clothesline to dry. It is worth noting that if you use poisonous plants such as tansy or many perennials, it is best to boil them outdoors. People who are sensitive may also experience symptoms from alum fumes when boiling the pot indoors.
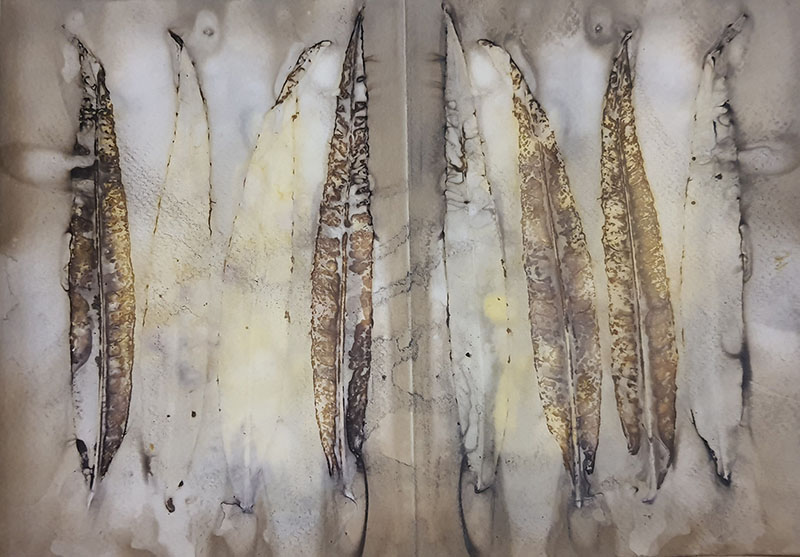
Leaves give different result depending on white side is against the paper. Upper side of the leaf gives less or different colour than underside. These are fireweed leaves.
It is exciting that each plant produces different result. Not all of them release colour, but the plant can still leave a mark on the paper, a kind of shadow image. Different sides of the leaves produce different patterns. The pattern can be positive or negative, and sometimes the colour can spread so that it is just a smudge on the paper. The colours can also transfer through the paper to the next sheet or to the other side of the paper. Vibrant red leaves often give dark green colour Purple flowers and leaves can turn green or bluish. Some yellow flowers give a red colour, and some give no colour at all. Orange flowers and leaves can give green or vibrant yellow. Brown leaves can give brown, green leaves can give green, bluish, yellowish, or not really anything. Raspberry leaves often give brown and black when they react with iron. Milkweed leaves often give brown and slightly black. Elephants ears brown leaves give brown and black.
As a perfectionist, I am fascinated by techniques where I have little or no control over the end result. It develops my tolerance for imperfect, uncontrollable outcomes, where nature and chance do the actual creative work. Of course, I can guide the creation by selecting and arranging the plants. The end result is still always more or less random, although through trial, error and experience, some control can be gained. The final pattern and colour scheme are influenced by the selected plants and the dyes they contain and their quantities, the amount of iron in the mixture, and the selected paper. I bought three pads of watercolour paper for this course. One of the pads was wrapped in plastic, so I didn’t realize at the time of purchase that the paper had a slight lilac tint compared to the other papers. In the pan, the colours evened out and the lilac tint of the paper faded. Of course, it may be that the paper affected the colours of all the other papers as well. For these pictures, I chose my own favourites, whose shapes and colours appeal to my eye the most.

Plants and folded A4 sheets waiting for the treatment.

Plastic dish has one liter of water and one table spoon of alum. Each sheet of paperi is dipped into the alum-water and then layered on top of the tile, seen on the left. Place plants between each sheet.

On top of the last sheet some plants and finally second tile. Then the whole bundle is tied together. Unfortunately I forgot to take photo of the boiling pans, but there are rusty horse shoes, nails and other rusty iron bits in there (or small amount of vitriol). Water has to cover the bundle completely and it has to boil 1-2 hours. The more iron in the water, the darker the colours become, less iron, more pastel results. You can use same liquid twice. Third boiling might make the sheets quite black, but even that can be artistic.

Sheets drying on laundry rack.

Purple alumroot leaf and flowers.

Unknown leaves, possibly purple Spiraea leaves and some other smaller leaves.

This print of a fern leaf is almost like art photograph.


Red autumn leaves. On the right side is the underside of the leaves, on the left is the “ghost print”, the upperside.

Withered flowers of meadowsweet.
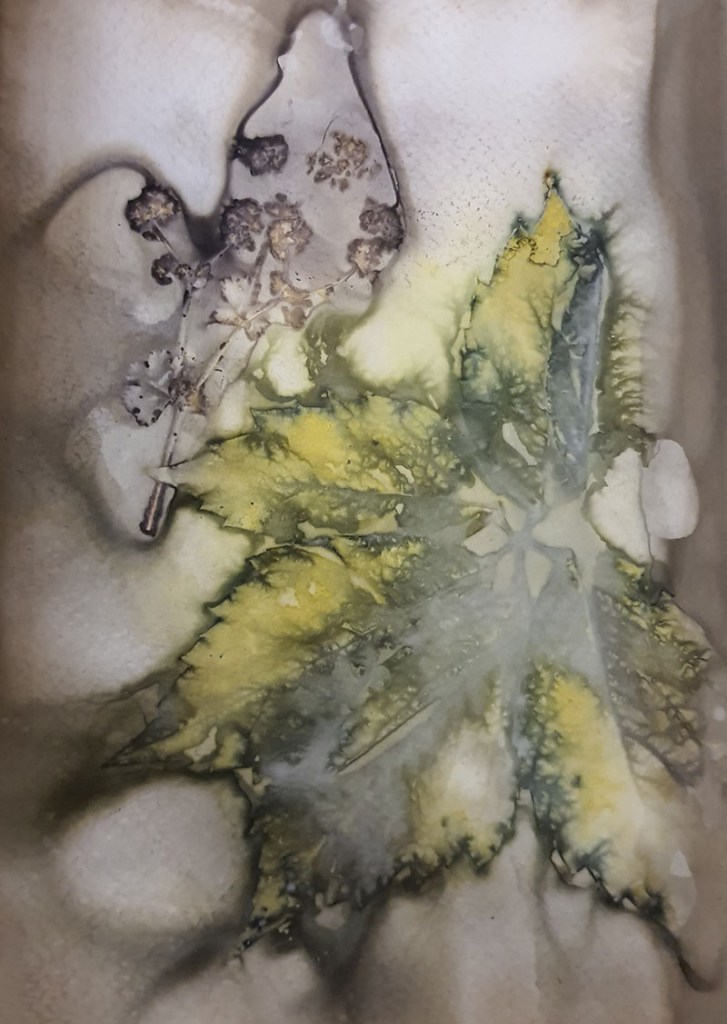
Vine leaf and red and yellow petals from marigold.

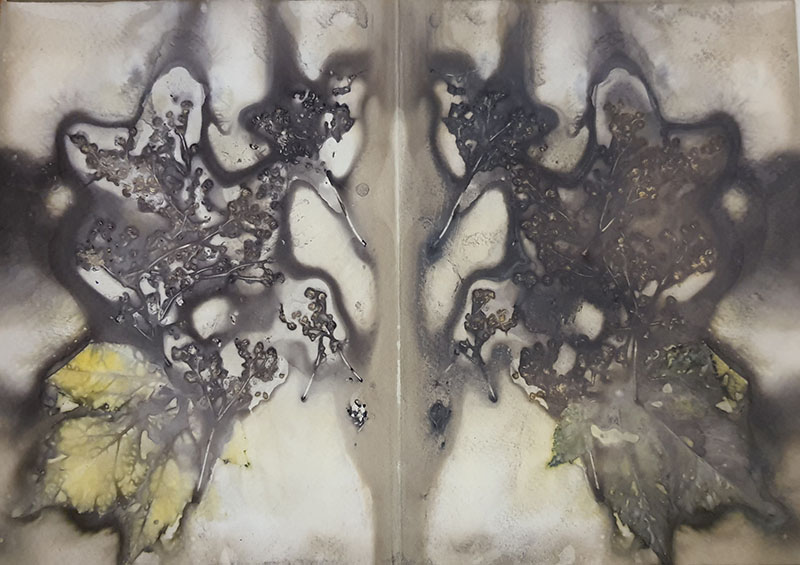
Orange colour comes form bright red dahlia petals, four-leaf shapes are form the autumn hydrangea flowers.
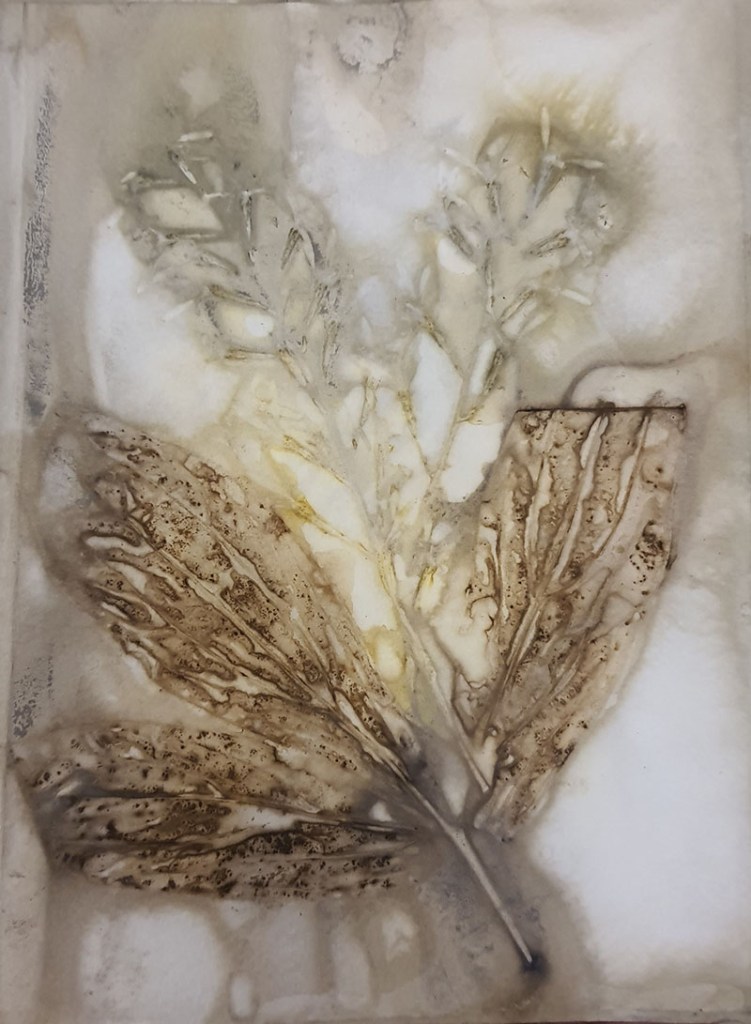
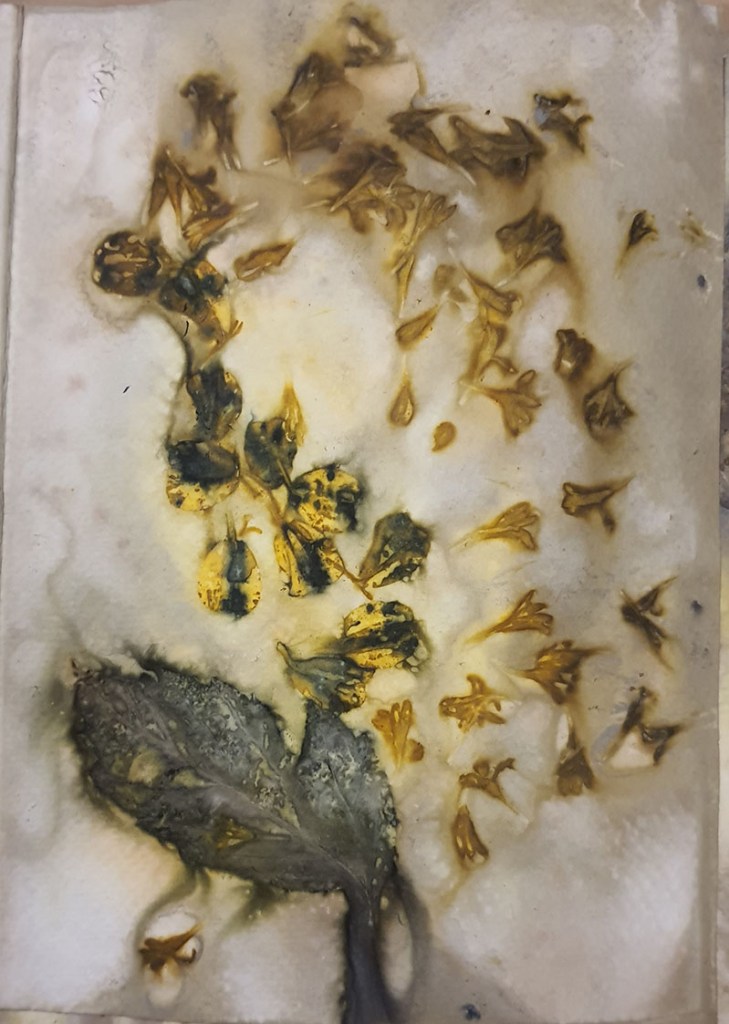
Brown leaf is from dried peony leaf, flowers are from unknown yellow flower.

Raspberry leafs

Rose leaves. Ghost print on the left is like a watercolour painting.
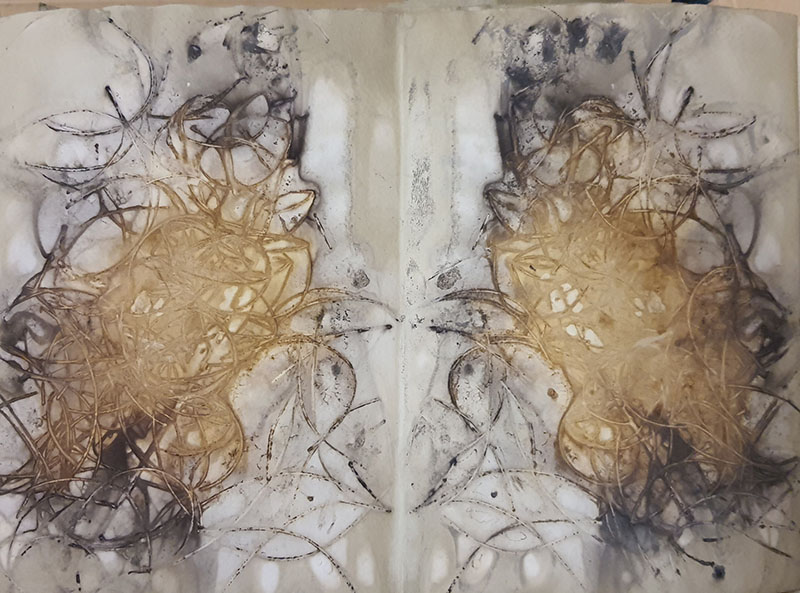
This funny mess is plain dried fireweed flowers with fluff.
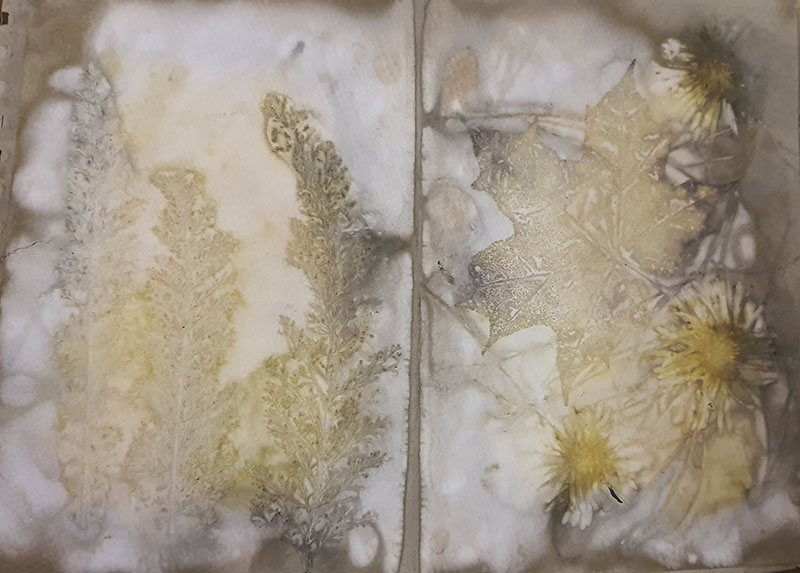
On the left fresh common yarrow leaves, on the right maple leaf and some unknown flowers, possibly michaelmas daisy.

Rumex leaf and some horsetail which looks like lunges.
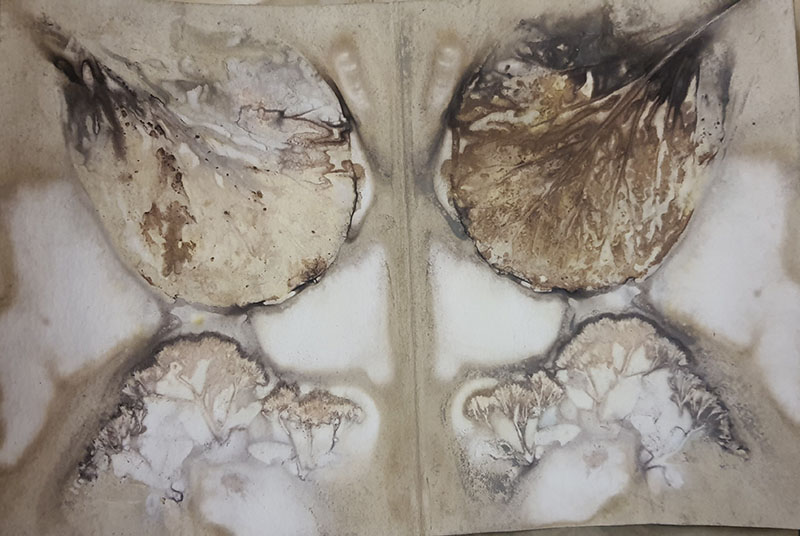
Bottom is orpine flowers, top is brown elephants ear.
Superhienoja! Näen jo mielessäni ekoprintattuja tilkkuja, joista olisi tehty tilkkutäkki.
Hehkuvainen – Kiinnostava idea! Tilkkutyöt eivät ole ominta aluettani, joten en tullut edes ajatelleeksi sitä, mutta kiehtova ajatus kyllä! Ainoa huono puoli näissä kasveilla värjätyissä on että ei voi aina tietää miten hyvin kestävät valoa. Jos tekisi tilkkutäkin, pitäisi hiukan ensin testata joidenkin kasvien valonkestoa ettei kävisi niin että vuoden päästä olisi valkoinen tilkkutäkki :D